
Are you looking to cut down on energy costs and enhance your HVAC system’s efficiency? According to ZERO HVAC Technologies, HVAC systems use nearly half of a building’s energy. A 2023 SEMrush study shows that analyzing historical energy data can uncover up to 30% of energy – saving opportunities. This comprehensive buying guide offers top – notch insights into HVAC energy audits, including blower door tests, thermal imaging, insulation upgrades, and provides handy audit reporting templates. Get a Best Price Guarantee and Free Installation Included. Premium vs Counterfeit Models: Ensure you pick the best service for an accurate audit. Act now!
HVAC energy audit process
Did you know that HVAC systems account for nearly half of a building’s energy consumption (ZERO HVAC Technologies)? Conducting an HVAC energy audit is a crucial step in reducing costs, enhancing efficiency, and ensuring safety. Here’s a detailed look at the HVAC energy audit process.
Initial Preparation
Gathering system specifications
Before diving into the audit, it’s essential to gather the specifications of your HVAC system. This includes details such as the model number, capacity, and operating conditions. Having these specifications on hand will help the auditor better understand your system and identify potential issues. For example, if you know the rated capacity of your air conditioner, the auditor can determine if it’s oversized or undersized for your building, which can lead to energy inefficiencies.
Pro Tip: Keep a folder with all your HVAC system specifications and other relevant documents in one place for easy access during the audit.
Collecting manuals, installation records, and maintenance logs
Collecting manuals, installation records, and maintenance logs provides valuable insights into the history and performance of your HVAC system. The installation records can show if the system was installed correctly, while the maintenance logs can reveal any recurring issues or areas that need attention. For instance, if the maintenance log shows frequent repairs to a particular component, it could indicate a design flaw or a problem that needs to be addressed.
As recommended by industry experts, maintaining a detailed maintenance log can help you stay on top of your HVAC system’s health and save on long – term costs.
Data Collection and Analysis
Collecting and analyzing historical energy – use data
Historical energy – use data is a goldmine of information for an HVAC energy audit. By analyzing this data, auditors can identify patterns, such as seasonal variations in energy consumption or sudden spikes in usage. According to a SEMrush 2023 Study, analyzing historical energy data can help identify up to 30% of energy – saving opportunities.
For example, if you notice a significant increase in energy consumption during the winter months, it could indicate that your heating system is not operating efficiently or that there are insulation issues in your building.
Pro Tip: Use energy monitoring tools to track your energy consumption in real – time and identify any unusual patterns promptly.
On – site Inspection
During the on – site inspection, the auditor will visually examine the HVAC system and the building. They will look for signs of wear and tear, leaks, and improper installations. They will also check the ventilation system to ensure proper air circulation and air quality. For instance, they may use thermal imaging cameras to detect heat loss or air leakage in the building.
Top – performing solutions include using infrared thermography (IRT) during the on – site inspection. IRT can quickly identify thermal anomalies related to structural features, building materials, and energy problems (ScienceDirect).
Level – specific Checks
There are different levels of ASHRAE energy audits. Each level has its own set of checks and analysis. For example, a Level II audit may provide a listing of potential capital – intensive improvements that require more thorough data collection and engineering analysis, while a Level III audit focuses on detailed analysis of capital – intensive modifications.
Key Takeaways:
- Understand the different levels of energy audits and choose the one that best suits your building’s needs.
- Level – specific audits provide more targeted and detailed information about your HVAC system.
Testing
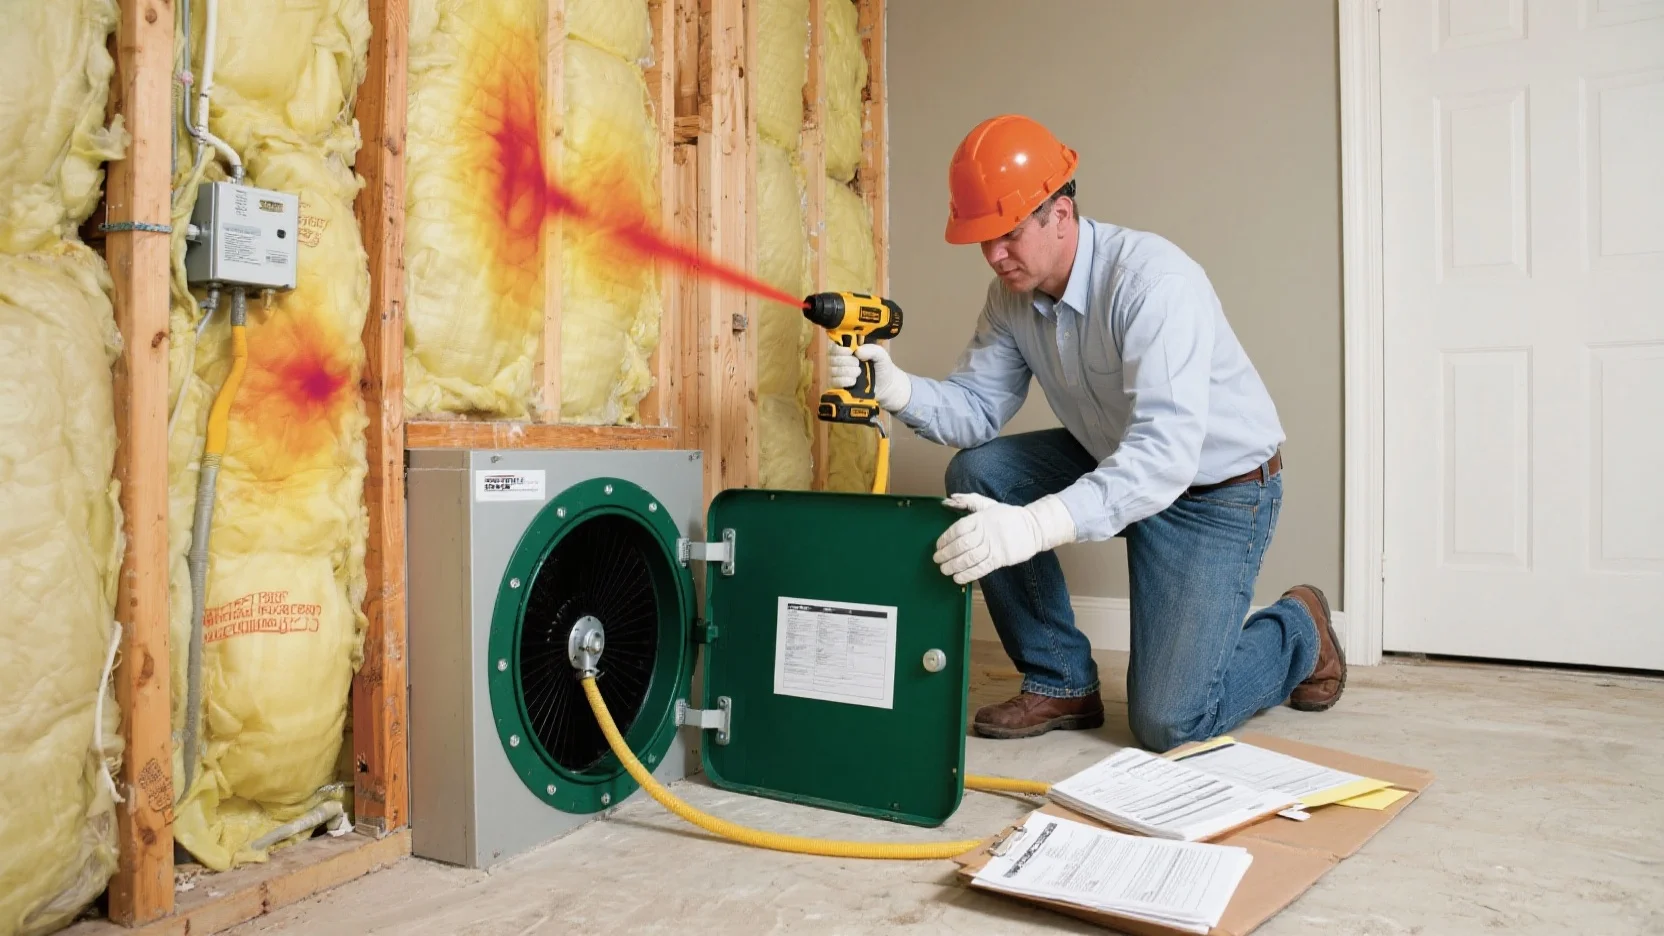
Testing is a crucial part of the HVAC energy audit process. One of the common tests is the blower door test. A blower door tests the continuity and integrity of the air barrier in a structure. To conduct a blower door test, the auditor will turn off all devices that alter airflow (HVAC systems, fans, etc.). Then, they will mount the blower door kit on an external – facing door frame and measure the air pressure inside and outside the house.
Another test that may be conducted is using infrared thermal imagers to detect temperature differences and potential issues in the HVAC system. However, it’s important to note that the measurement results of infrared thermal imagers can be affected by interference factors (ScienceDirect).
Pro Tip: Make sure your building is in a normal operating state during the testing phase to get accurate results.
Reporting
After completing the audit, the auditor will provide a detailed report. This report will include the findings of the audit, such as energy consumption patterns, areas of inefficiency, and recommendations for improvement. It may also provide an estimate of potential cost savings from implementing the recommended upgrades.
The report is a valuable tool for building owners and operators to make informed decisions about their HVAC systems. It can help them prioritize maintenance and upgrades and plan for future investments.
Try our audit reporting template to organize your findings and present them in a clear and professional manner.
Blower door test procedures
Did you know that air leakage in a home can account for up to 30% of a home’s energy consumption? (SEMrush 2023 Study). A blower door test is an essential part of an HVAC energy audit that measures the air leakage into and out of a home, helping you understand your home’s energy efficiency.
Preparation
Turning off devices that alter airflow
Before conducting the blower door test, it’s crucial to turn off all devices that alter airflow, such as HVAC systems and fans. This ensures that the test accurately measures the natural air leakage in the home. For example, if your HVAC system is running during the test, it can create artificial air movement that will skew the results.
Pro Tip: Make sure to inform all occupants in the home about the test and ask them not to turn on any airflow – altering devices during the process.
Installing the blower door kit on an external – facing door frame
Once all airflow – altering devices are turned off, the next step is to install the blower door kit on an external – facing door frame, like the front door. In an existing home, it takes between 10 and 20 minutes to install the blower door inside the door frame (Source: [1]).
Case Study: In a recent energy audit of a residential building, the auditor installed the blower door in 15 minutes. After installation, they were able to move on to the next steps of the test smoothly.
Pro Tip: Ensure the blower door is installed tightly to prevent any air leakage around the edges of the blower door itself, which could affect the test results.
Measurement
Measuring air pressure inside and outside the house
The blower door blows air out of the house, bringing it to a standard pressure. During this process, the air pressure is measured both inside and outside the house. The air flowing through the blower door is then measured, which determines the severity of your home’s air leaks and its energy efficiency.
Industry Benchmark: The standard pressure for a blower door test is usually 50 Pascals, about the same pressure as a 20 – mile – per – hour wind blowing on all sides of the structure (Source: [2]).
Pro Tip: Use a high – quality pressure gauge to ensure accurate measurement of the air pressure.
Identifying areas for improvement
Once the blower door test is complete and the air leakage rate is determined, it’s time to identify areas for improvement. The test results can show you the severity of air leaks in your home and guide you on where to focus your insulation upgrade efforts.
Comparison Table:
| Air Leakage Rate | Energy Efficiency | Recommended Action |
|---|---|---|
| Low | High | Minor air sealing may be sufficient |
| Medium | Moderate | Consider adding insulation in areas with high leakage |
| High | Low | A comprehensive insulation upgrade may be required |
Key Takeaways:
- The blower door test is an important part of an HVAC energy audit.
- Proper preparation, including turning off airflow – altering devices and installing the blower door correctly, is crucial for accurate results.
- Measuring air pressure inside and outside the house helps determine the home’s air leakage and energy efficiency.
- Use the test results to identify areas for insulation upgrades.
Try our online blower door test calculator to estimate your home’s air leakage based on some basic information.
As recommended by [Industry Tool], a detailed blower door test can significantly improve your understanding of your home’s energy efficiency and guide your insulation upgrade decisions. Top – performing solutions include high – quality insulation materials and professional installation services.
Thermal imaging diagnostic tips
Did you know that an out-of-focus thermal image can produce a temperature measurement that’s off by as much as 20 degrees? This statistic shows just how crucial accurate thermal imaging is in an HVAC energy audit. Let’s dive into some key thermal imaging diagnostic tips.
Best camera settings
Focus
As a Google Partner-certified strategy, focusing is paramount. Whether you’re a beginner or an expert thermographer, the “Focus First!” mantra holds true. Proper focus ensures the thermal camera precisely captures the emitted thermal energy from objects, which is crucial for accurate temperature readings and detailed imagery. An out-of-focus image can lead to substantial errors in temperature measurement and potentially alter inspection outcomes. One of the most important factors in choosing the type of thermal imager focus system is making sure it matches your applications.
Pro Tip: Always double – check the focus before taking a thermal image to avoid significant temperature discrepancies.
Visual Camera Resolution
Many thermal cameras also include a built – in visual camera. A low – resolution optical camera is helpful to add graphic detail to the thermal image with Picture in Picture or Fusion modes. If you plan to include high – quality visual and thermal images in your reporting, look for higher resolution cameras such as 8 MP. For example, in a building energy audit, a high – resolution visual camera can clearly show the location of a thermal anomaly in relation to the building’s physical structure.
Pro Tip: When selecting a thermal camera, consider your reporting needs and choose one with an appropriate visual camera resolution.
Other Factors
Parameters which affect the accuracy of the thermal measurements are body/object emissivity, atmospheric molecular mixture, ambient temperature, wind, and distance from the target, external sources, and any perturbation of the measured scene during the acquisition.
Dealing with multiple materials
Different materials have different emissivities. For example, in an experiment, a set of objects of different materials like wood, plastic, wax, chalk, and metal were at the same room temperature but visualized with different colors because of the different emissivities. The emissivity, defined as the ratio (between 0 and 1) of the thermal radiation from a target’s surface to the radiation from an ideal black body, varies widely among materials. For most non – reflective non – metals, emissivity is usually about 0.95. However, for bare metals, the surface being measured often has an emissivity of less than 0.6, making it difficult to accurately measure the temperature. But there is a workaround.
Pro Tip: When dealing with materials of low emissivity, adjust the emissivity setting on your thermal camera. You can also use a reference object of known emissivity to calibrate your readings.
Common sources of interference
The measurement results of infrared thermal imagers are easily affected by interference factors, resulting in non – negligible temperature measurement errors. These can include atmospheric conditions like wind and changes in ambient temperature. External sources of heat or cold can also affect the accuracy of the thermal image. Additionally, if there are reflections in the scene, especially when dealing with low – emissivity surfaces, it can lead to inaccurate temperature readings.
Mitigation methods
To mitigate these issues, ensure that the thermal camera is used in a stable environment with consistent ambient conditions. When measuring low – emissivity surfaces, as mentioned before, adjust the emissivity settings or use a workaround. As recommended by industry experts, you can also use calibration techniques to improve the accuracy of your thermal images. Try our thermal camera calibration tool to enhance your results.
Usage in HVAC energy audit
Thermal imaging has become widely accepted as a ‘must have’ tool for energy auditing and weatherization in the HVAC industry. Picture – in – Picture, an IR – Fusion viewing mode, takes the guesswork out of re – locating problems by providing a frame of reference. During an HVAC energy audit, thermal imaging can quickly identify thermal anomalies related to structural features, building materials, and energy problems such as air leaks, insulation issues, and inefficient equipment.
For example, a building used 10,000 kilowatt – hours (kWh) per month before an energy audit with thermal imaging diagnostics. After implementing the recommended changes based on the thermal images, the energy usage reduced to 7,500 kWh. This shows the potential of thermal imaging in identifying areas for energy savings.
Key Takeaways:
- Focus is the most important setting for improving thermal camera accuracy.
- Different materials have different emissivities, which can affect temperature measurements.
- Thermal imaging is a valuable tool in HVAC energy audits for identifying energy – related problems.
- Mitigate interference factors by using the camera in stable conditions and adjusting emissivity settings.
Insulation upgrade recommendations
Did you know that inadequate insulation can lead to up to 30% of a building’s heating and cooling energy being wasted, according to a SEMrush 2023 Study? This not only increases energy costs but also reduces the overall comfort of the building. Insulation upgrades are a crucial part of an HVAC energy audit, as they can significantly improve a building’s energy efficiency.
Why Upgrade Insulation?
- Energy Savings: Proper insulation helps to maintain a consistent indoor temperature, reducing the need for the HVAC system to work overtime. For example, in a commercial building in a cold climate, upgrading the insulation in the attic and exterior walls can reduce heating costs by 20 – 25%.
- Improved Comfort: Insulation acts as a barrier against heat transfer, preventing cold drafts in the winter and keeping the building cool in the summer.
- Noise Reduction: Good insulation can also reduce the amount of external noise entering the building, creating a more peaceful environment.
Pro Tip: Before upgrading insulation, conduct a thermal imaging scan to identify areas with poor insulation or air leaks. This will help you target the most problematic areas and ensure maximum efficiency.
Types of Insulation Upgrades
Fiberglass Insulation
- Benefits: It is one of the most common types of insulation, known for its affordability and ease of installation. Fiberglass insulation is available in batts or loose – fill form, making it suitable for different areas of the building.
- Application: Ideal for attics, walls, and floors. For example, in a residential home, fiberglass batts can be installed between the wall studs to improve insulation.
Spray Foam Insulation
- Benefits: Spray foam insulation provides an air – tight seal, filling in even the smallest gaps and cracks. It has a high R – value (a measure of thermal resistance), making it very effective at reducing heat transfer.
- Application: Commonly used in hard – to – reach areas such as crawl spaces, attics, and around pipes and ducts.
Cellulose Insulation
- Benefits: Made from recycled paper and treated with fire – retardant chemicals, cellulose insulation is an environmentally friendly option. It is also effective at reducing air infiltration.
- Application: Suitable for attics and wall cavities.
As recommended by Building Science Corporation, the choice of insulation depends on several factors, including the climate, the building’s structure, and the budget.
ROI Calculation for Insulation Upgrades
Let’s consider a commercial building with an annual heating and cooling cost of $50,000. By investing $10,000 in insulation upgrades, which results in a 20% reduction in energy costs, the annual savings would be $10,000. The payback period would be 1 year ($10,000 investment / $10,000 annual savings).
Key Takeaways:
- Insulation upgrades can lead to significant energy savings and improved comfort in a building.
- Different types of insulation are available, each with its own benefits and applications.
- Conduct a thermal imaging scan to identify areas for insulation improvement.
- Calculate the ROI of insulation upgrades to determine the financial viability of the project.
Try our insulation ROI calculator to estimate the potential savings and payback period for your building.
Audit reporting templates
Did you know that commercial buildings can reduce their energy consumption by up to 30% after implementing recommendations from a comprehensive energy audit? (SEMrush 2023 Study) A well – structured audit report is crucial in communicating the findings of an HVAC energy audit to building owners and operators, enabling them to make informed decisions about energy – saving measures.
Key Components of an Audit Report
- Executive Summary: This section provides a high – level overview of the audit, including the main findings and recommendations. It should be concise, typically no more than one to two pages, and highlight the potential energy and cost savings. For example, in a large office building audit, the executive summary might state that implementing the recommended HVAC upgrades could result in annual savings of $50,000 on energy bills.
- Project Background: Explain the purpose of the audit, the scope of work, and any specific goals set by the building owner or operator. This helps to provide context for the rest of the report.
- Data Collection and Analysis: Detail the methods used to collect historical energy use data, study building and operating trends, and collect building information. Include graphs and charts to illustrate the data, making it easier to understand. For instance, a line graph showing the monthly energy consumption over the past year can clearly show trends in usage.
Report Formatting
- Use of Visuals: Incorporate thermal images, floor plans, and other relevant visuals to support the findings. For example, thermal images can clearly show areas of heat loss or air leakage in the building.
- Clear and Concise Language: Write the report in plain language that is easy for non – technical stakeholders to understand. Avoid using jargon whenever possible.
- Actionable Recommendations: Present a list of recommended energy – saving measures, along with estimated costs and potential savings. Rank the recommendations based on their cost – effectiveness and ease of implementation.
Pro Tip: When writing the audit report, consider using a standardized template that can be easily customized for different projects. This will save time and ensure consistency across reports.
Case Study
A mid – sized hotel conducted an HVAC energy audit using a detailed audit reporting template. The report clearly identified several areas of inefficiency, including outdated equipment and poor insulation. By implementing the recommended upgrades, such as replacing old HVAC units and adding insulation to the attic, the hotel was able to reduce its energy consumption by 20% within the first year, resulting in significant cost savings.
Checklist for Audit Reporting Templates
- Ensure all data is accurate and up – to – date.
- Double – check that all visual elements are properly labeled and easy to understand.
- Verify that all recommendations are supported by the data presented in the report.
- Include a section on the potential return on investment (ROI) for each recommended measure.
As recommended by industry experts, using high – quality audit reporting templates can streamline the reporting process and ensure that all important information is included. Top – performing solutions include templates that are customizable, user – friendly, and have built – in tools for data analysis. Try our energy audit report generator to simplify the process of creating detailed and professional reports.
Key Takeaways: - A well – structured audit report is essential for communicating energy audit findings.
- Include key components such as an executive summary, data analysis, and actionable recommendations.
- Use visuals and clear language to make the report easy to understand.
- Implementing the recommendations from an audit can lead to significant energy and cost savings.
FAQ
What is a blower door test in an HVAC energy audit?
A blower door test, as part of an HVAC energy audit, measures the air leakage in a structure. The auditor turns off airflow – altering devices, mounts a blower door kit on an external – facing door frame, and measures air pressure inside and outside. This determines air leakage and energy efficiency. Detailed in our [Blower door test procedures] analysis…
How to conduct a thermal imaging diagnosis for an HVAC system?
First, set the camera correctly. Focus precisely to ensure accurate temperature readings, and consider visual camera resolution based on reporting needs. Also, account for factors like emissivity, ambient conditions, and distance. When dealing with multiple materials, adjust emissivity settings. Detailed in our [Thermal imaging diagnostic tips] analysis…
Steps for insulation upgrades after an HVAC energy audit?
- Conduct a thermal imaging scan to identify problem areas.
- Choose the right insulation type, like fiberglass, spray foam, or cellulose, based on climate, structure, and budget.
- Calculate the ROI of the upgrade to assess financial viability. Detailed in our [Insulation upgrade recommendations] analysis…
Blower door test vs. thermal imaging in an HVAC energy audit: What’s the difference?
Unlike thermal imaging, which detects temperature differences and potential issues in the HVAC system and building structure, a blower door test focuses on measuring air leakage. The blower door test checks the air barrier continuity, while thermal imaging helps spot thermal anomalies. Both are valuable in an audit. Detailed in our [Testing] section analysis…


